How To Raise and Grow Your Own Mealworms at Home
Mealworms are Great for Bluebirds, Purple Martins, and Chickens
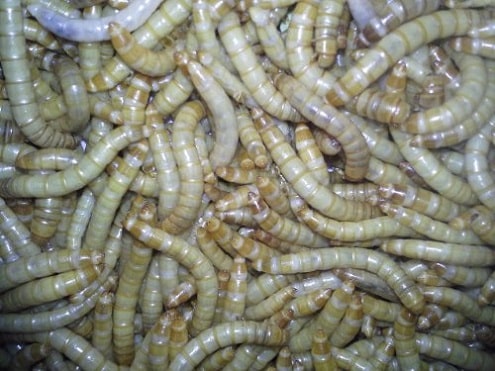
Want an easy method of raising mealworms from home to feed to your birds and chickens? Here, we have two similar methods.
The first by Kathryn Kessler republish with consent from birdfeeding.org:

Mealworms - Easily Grow Your Own From Home
How To Raise and Grow Your Own Mealworms
Mealworms "Refresher"
An additional commentary about mealworms, following the article in the most recent issue of The Bird's-Eye reView, came from Kathryn Kessler in Newton, Iowa. She says,
"I have been feeding mealworms for two years now and find them incredibly easy to raise. I keep a supply going year 'round," she wrote.
"I have two plastic tubs (13 1/2 x 17x 6) with lids in which I use a mix of wheat bran and chicken feed (non-medicated) for the worm bedding.
I add sliced carrots, zucchini, celery, or lettuce. "The worms cycle through to the bug form, which lays eggs in the bedding.
The eggs hatch into tiny worms that grow into adults and the life cycle then repeats itself.
"In the spring and summer, I sometimes feed as many as 100 worms a day when the birds are busy feeding their young.
I have had great success attracting several bird species to the mealworms.
My favorites to watch are the catbirds that make trip after trip to the feeder, eat a few worms, and then select two or three to take back to their nestlings.
My biggest frustration is with the robins, which are gluttons of the highest magnitude.
I counted as one robin packed 25 worms in its bill before it flew away.
I have been feeding the worms from a shallow dish on the deck floor.
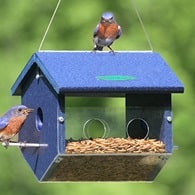
I am considering some kind of hanging feeder with an opening that would exclude some of the larger birds.
Mealworms have been a great addition to my birds' diets."
© birdfeeding.org.
Joe Bryant Adds a Fewe More Details
What You'll Need To Get Started Growing Mealworms
Joe raises large numbers of mealworms at his home, which is good if you have a flock of chickens or a large Purple Martin Colony.
However, if you're just wanting to feed the birds from time to time, you can scale down both the ingredients and material sizes.
- One RUBBERMAID - Jumbo Storage Box - 40 gallons. Note: The container must be opaque because they must be raised in the dark.
- One 50# bag of WHEAT BRAN - get from any feed store, and bake what you need as you need it in an oven until it's all hot enough to destroy any eggs of mealy bugs.
You can store extra in the bag in a freezer until you need more.
- 2 paper grocery sacks (cut off the bottom, cut up the sides, fold in half, and put on top
- CARROTS (whole) and/or potatoes cut in half cut side down (make three columns lengthwise). They must have these for moisture.
Carrots are much easier to work with and don't cost that much more than potatoes.
- 1000 mealworms measuring 1 inch in size can be ordered from Amazon Check Price of Mealworms. Keep the temperature in mind about shipping.
Setting Things Up
Now Let's get started growing our mealworms.
Pour four to six inches of wheat bran into the container (add more later when you see that they need it).
Put the carrots/potatoes on top, dump all the mealworms, and cover them with the grocery sack paper.
Do nothing until the large mealworms turn into white, motionless grub that then turn into beetles.
Once you have several hundred beetles, start collecting/using the large ones that crawl between the folded paper by sliding them into a container.
Do this every other day, whether you need them or not; they can be kept indefinitely in a ventilated container in the refrigerator.
Those being kept in the refrigerator should be taken out for two or three hours each week so that they can be fed wheat bran and watered with carrots.
Don't bother with the dead beetles; the baby worms will suck them dry, and their body parts will sift to the bottom of the container. Mealworm Notes:
- Don't use egg crates, etc., they're a pain in the neck. With the paper sacks, you can slide the large ones into a container easily.
Carrots leave only a long, hard core; they and the dried potato skins should be removed occasionally.
- For some reason that I cannot explain, only the large worms crawl into the folded paper once the process starts.
Stay up with removing most (not all) of them, or you will have a million mealworms on your hands in a very short time, and an odor will develop.
Each pair of beetles will produce several hundred babies.
60 beetles will produce several hundred babies for each of the 30 days in a month. SO STAY UP WITH THEM.
- Keep the container in a heated room during spring and summer, but store them in a cool garage when you will not need them.
Heat and moisture are needed for growth.
During the summer, I just lay the lid over the top.
During the winter, the handles of the Rubbermaid Jumbo Box have vent holes that provide all the ventilation they need.
Mealworms will multiply at temperatures ranging from 65 to 100 degrees F. The optimum seems to be about 80 degrees.
I keep my house at about 74 degrees during the summer. I only keep them inside because it's more convenient.
Remember that this is not rocket science; they know what they're supposed to do and will do what they're supposed to do.
All you have to do is ensure that they always have enough wheat bran and carrots.


